1/8/2008
Inboard Elevators and some Ramblings
Before I get to this installment's update, I wanted to pass on some of my thinking on the project. I sometimes take for granted what the plan is, as I talk about it with my local flying buddies all the time, but as we've recently gotten into construction of the first plane here, I've gathered that it may raise other questions, especially when you see the next few updates.
With all of this work on this project, much of it new to me, and with this not being a normal aircraft design, I'm quite realistic that initial test flights will have a high degree of risk to them. I also know that now that I've got my tooling down, that making an airplane from the molds is not the monumental job that it has been getting to this point either.
With all that in mind, what you see being build here and now, is a test mule. It will be rough. It will get no finish paint. It will have holes hacked in it where hatches need to be. It will have no retracts, much less gear doors. And, although I cringe at the thought of it, it will even have propellers on it, for the initial test flights.
The point of this specific aircraft, is to test it's air worthiness. Is the balance right? Does it even fly right side up? At what airspeed does it start to have flutter issues? Will the fuse crumple at a 9 g turn? As you see this evolve, you'll see a test flight program, that will slowly start to open up the envelope of what is safe, and what it can and can't do. Yes, it will even be intentionally stalled. (Anyone that has seen a model Blackbird stall, knows the bravery in making that statement.) I will be much more inclined to test all the things that need to be tested on as inexpensive of a test bed as possible, and one that has the least amount of work to get there. As things get 'checked off', other systems will be added to the test plane, one at a time, and see how they pan out.
Now...if all goes well... A second bird will pulled from the molds, and that one is the one that will be decked out, and the one that the public will see at the jet meets. It will be finished, with nomenclature, drag chute, retracts / gear doors, cockpit details, maybe even some blow-in doors on the nacelles. But it's silly to show up at the field with a bird with all those details, to conduct test flights on. And I mean real test flights... Not just the kind that say, "Does it fly?"
So... The coming updates will probably be full of both screw-ups and success stories, this one included. But figuring all this stuff out, is part of the fun. Two phrases Jerry quotes to me are very applicable: "It's just a hobby." "You're just making that up, aren't you?" Yes to both.
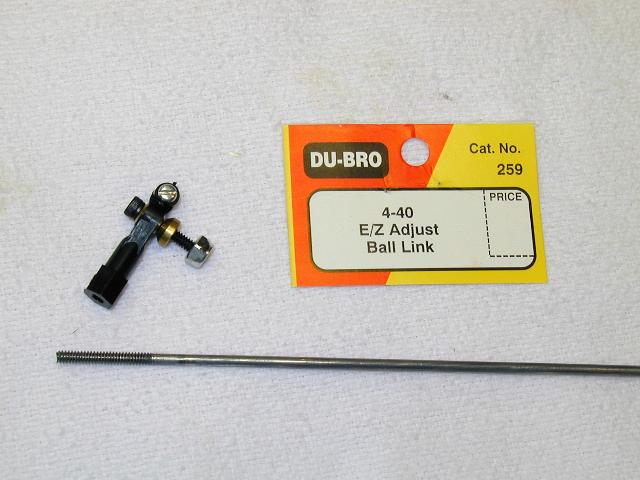
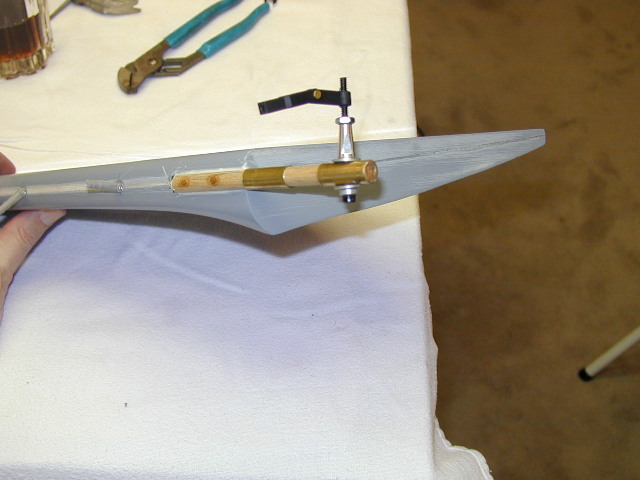
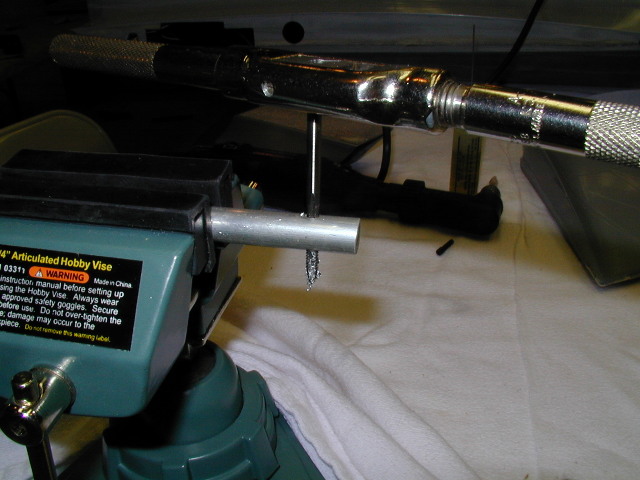
Enough rambling, on to the update. Last update you saw some weights on an elevator. It seemed wise to double check that the linkages were going to be up the task, in addition to what the servo's power output is. I decided to go ahead and test to destruction a couple of the links I had already been using, out of curiosity. I had no idea what to really expect, or where they would fail. If they busted at say 25 lbs, they would be unusable. First photo, the exact linkage in use.
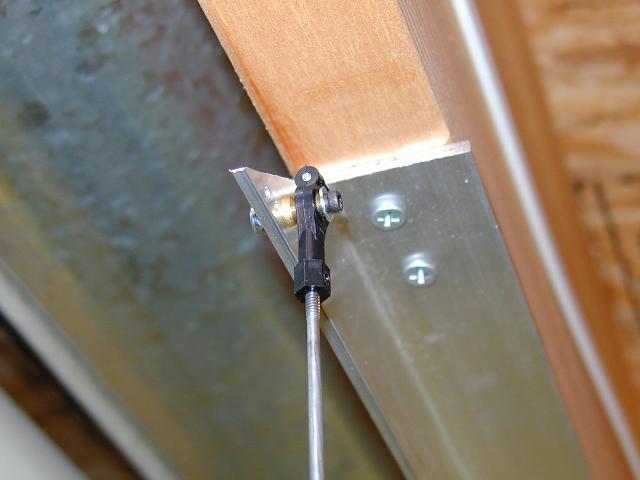
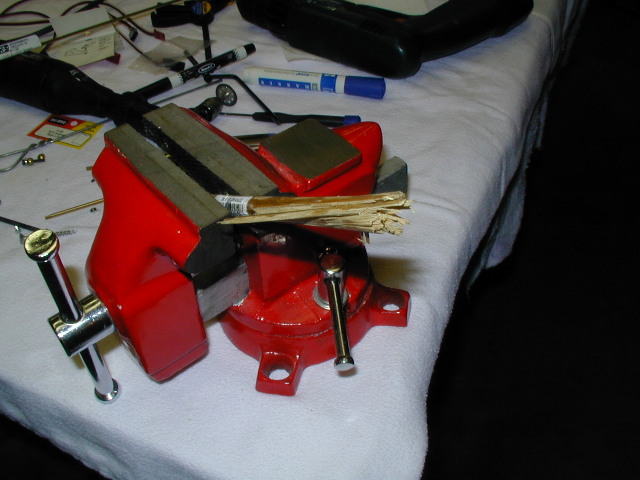
Second photo, the test rig setup. This is the same 1/8 inch aluminum drilled and tapped, that is the anchor point on the outboard wings. I bent a loop in the bottom of the wire push rod, tied in a good sized rope, stood on a bathroom scale, and as I pulled down on the wire, the scale read lighter and lighter, to calculate how many pounds of force was being exerted on the link.
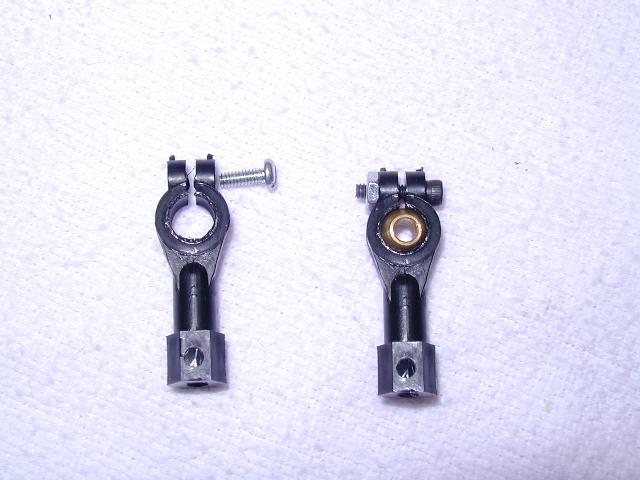
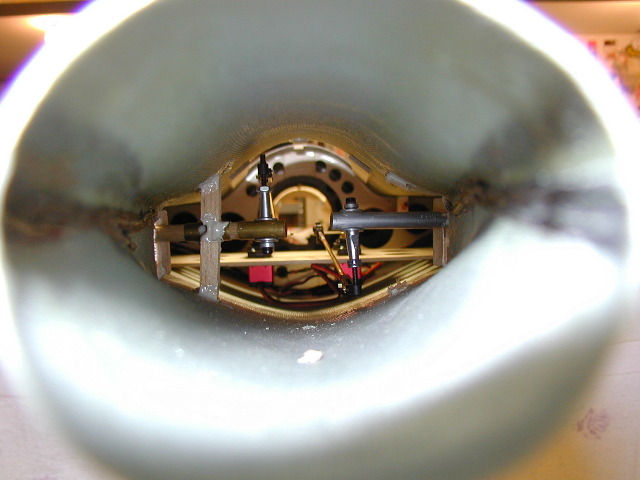
So, in photo 3 here, we see the result of test 1. The link on the left is the failed one. What failed though surprised me. The threads did not pull out, but instead the holding screw at the top / tip, stripped out, letting the ball slip out the end. Here's the kicker..... It failed at 130 lbs of force. I would figure it would break much sooner. Anyhow, I thought I'd try it again, addressing where it failed at, by putting in a bolt and a nut instead of the stock screw. You can see that in the right of the photo.
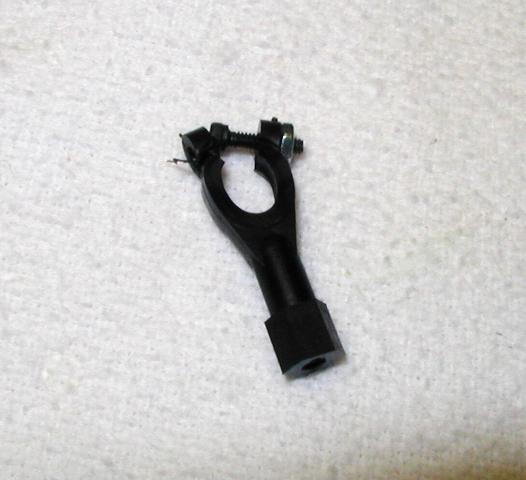
Last photo on this little linkage test set. It died in the same manner actually, but this time pulled the head of the bolt THROUGH the end of the clevis. Also, this time, it actually stretched out the round hole that holds the bearing in the middle. It did not do that on test one. Result of this one.... Failure at 160 lbs of force. I was getting very close to hanging from it. By the way, Jerry was watching the scale as I was keeping my head down, while wearing about 3 hats for protection. Unfortunately, I do not have a photo of Jerry holding the foam over his head. :) I am going to keep an eye out for stronger linkages, but for now think these can handle what the servo can put out.
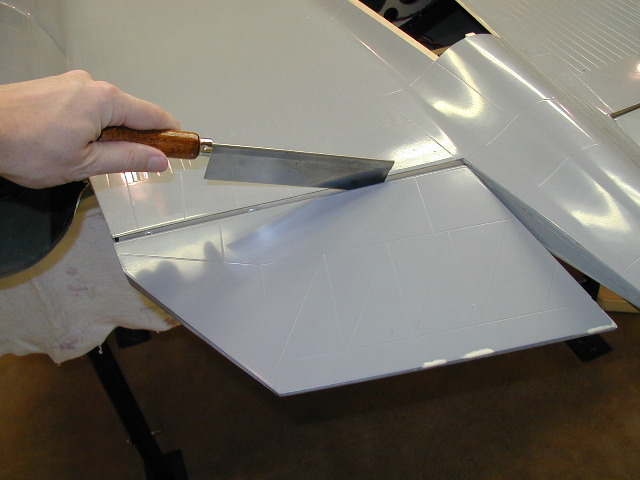
Inboard Elevators. I started off installing them in the same manner that I put the ones in the Yellow Blackbird, I built about 12 years ago. There were no instructions with that plane, so I had to make it up back then too, but at least I knew that it worked, so it seemed like a good place to start.
Here is where a problem showed up. I had them hinged, mounted, and linked to the servos... All done. I then went back to the elevator, and with very little force, yanked it up and down. Way, way too sloppy. Quite aggravating. I then began looking to see where it was coming from and realized that it was the ½ inch wooden dowel that was twisting torsionally. I would have thought this a minimal problem since the distance it can twist in, is just about 2 inches, but it was a mess. I did some testing to see what force it took to twist and ultimately to fail. Way to weak.
So, (and I hated to do this), I hacked them back off the plane and started over.
They have been replaced with a ½ inch aluminum rod.
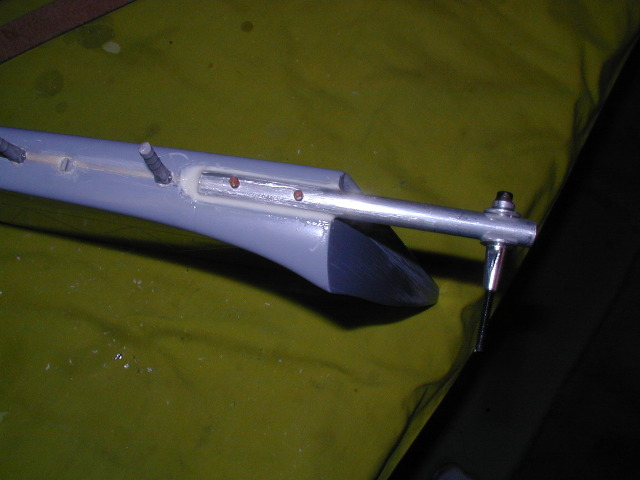
I've also drilled and taped the rod itself to further hold the bolt going through it.
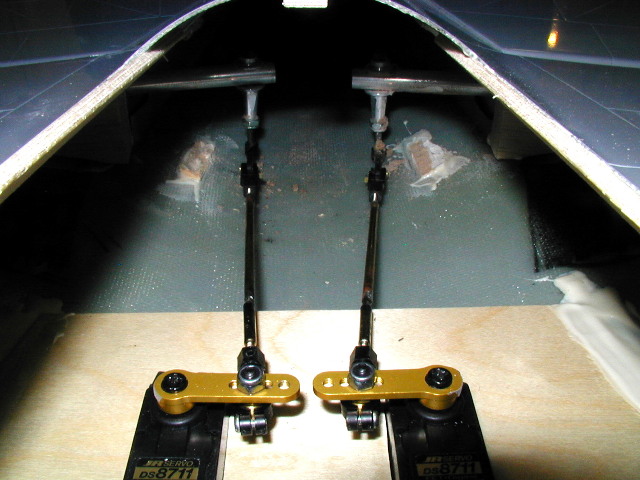
Here you can see the 2 linkages. One bad one, and one that looks like it will be acceptable.
Also, I didn't like how the push rods lined up the first time around. So I had to grind out the original servo tray, and make a smaller one; one that would sit lower in the plane, and give better, more direct linkage hookup, with better angels. I also moved it back, taking 2 inches off the push rods as well.
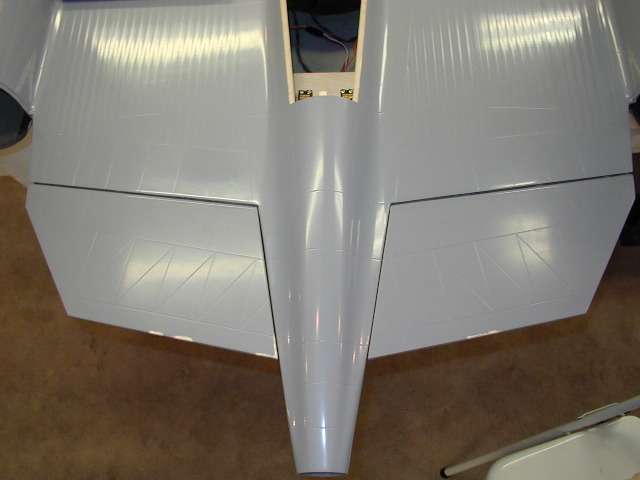
Inboard Elevator Installation, take 2... All done.
Head back to the Main Page